Volume Files
The last entry in the Project Status section is Volume Files and offers an overview of the loaded volume fields and shortcuts to modify them. After loading a volume file (e.g., after an effective stiffness simulation with ElastoDict-FeelMath-VOX), the number of the loaded Volume Files appears in the Project Status section.
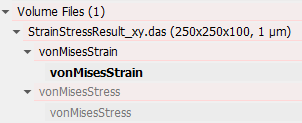
Each of the volume files consists of volume images and they contain volume fields. In the example shown here, the volume file StrainStressResult_xy.das is loaded. It has the volume images vonMisesStrain and vonMisesStress, and they contain a volume field with the same name, respectively. The volume field vonMisesStress is grayed out, because it was not selected in the loading volume file dialog.
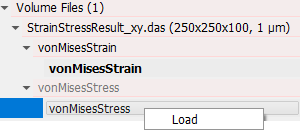
With a right click on the name of the volume field, the Load option is available. Alternatively, double clicking on a volume field loads it into GeoDict and it can be seen in the Visualization area.
Volume Files right-click menu
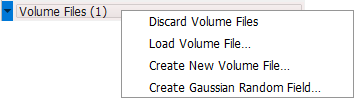
Right-clicking on Volume Files opens a list of options.
Discard Volume Files and Load Volume File are the same as those from the File menu in the menu bar. You can also Create a Gaussian Random Field.
 Create New Volume File
In the Create New Volume File dialog, enter a Filename und define the Volume File Type.
You can choose a preset of GeoDict volume file structures or choose empty. In the latter case, the created volume file does not contain any image or field. Instead, the user can fill the file with Create New Image and New Field, which are described below.
If a predefined volume file was chosen, the volume file contains the standard images and fields of this volume file type. For example, the preset vap produces a volume file that contains a Velocity image with the fields VelocityX, VelocityY, VelocityZ, and Velocity and a Pressure image with the Pressure field. All the fields contain zero values and can be filled afterwards using, e.g., the Math Operations or via Python scripting with GeoPy.
Set the Dimension NX, NY, and NZ of the new volume file in number of voxels. The size will be inherited by the images and fields.
Additionally, you must set a Voxel Length that is larger than zero. You can choose the length unit from the pull-down menu in the upper right corner of the dialog.
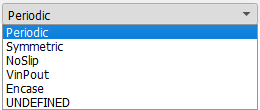
Finally, you can choose the Boundary Condition in each direction.
The new volume file is only stored in GeoDict. To save it to the hard disk, click on Save Volume File.
|
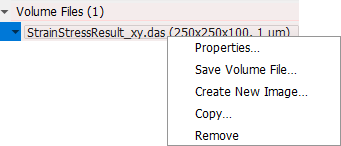
Volume File name right-click menu
A right click on a loaded volume file name provides further options.
Properties
Choose Properties to get information on the volume file loaded. In the Properties tab, the Name of the volume file can be changed. The Voxel Length and the Boundary Conditions cannot be changed.
In the Header tab, you can observe the header of the volume file, which are Key-Unit-Value pairs. They contain useful information about the creation of the volume file. You can add your own Key-Value pairs below the table.
The changes are only stored in GeoDict, to save them to the hard disk, click on Save Volume File.
|
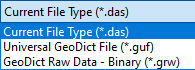
Save Volume File
Save the volume file to the hard disk as Current File Type, Universal GeoDict File (*.guf), or as GeoDict Raw Data - Binary (*.grw).
|
Create New Image
With Create New Image two types of images can be created.
If Scalar is chosen, an empty volume image is created and a New Field can be created.
If Vector is chosen, the unit for the vector field must be entered (e.g. m/s for a velocity field). Then, a volume image with 4 volume fields (containing only zeros) is generated. The created volume fields are the component fields for the X-, Y-, and Z-direction and the supplemental field containing the automatically computed norm.
|
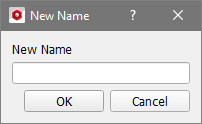
Copy
With Copy… the entire volume file including all images, fields, and values is copied, after entering a name for the new volume file.
The new file is only stored in GeoDict. To save it to the hard disk, click on Save Volume File.
|
Remove
Click on Remove to delete the volume file including all its images and fields from the GeoDict memory.
|
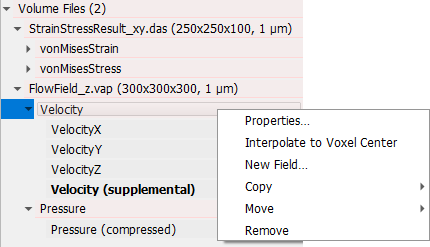
Volume Image right-click menu
Right-clicking on a volume image opens further options. As some options are only available when 2 or more volume files are loaded, the additional volume file FlowField_z.vap was loaded.
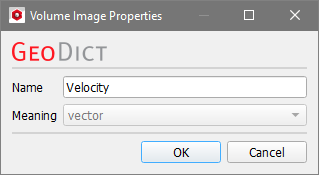
Properties
Choose Properties to see the name of the volume image and if it is a scalar of vector volume image (see Create New Image). You can change the name of the image. Remember to save the volume file to the hard disk to keep the modifications.
|
Interpolate to Voxel Center
The function Interpolate to Voxel Center interpolates the data in the fields to the voxel centers using the values on edges and faces of the voxels. It is only available for vector images and not for scalar images.
|
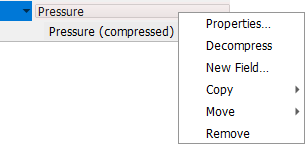
Decompress
The option above is not available if a compressed volume file is loaded without decompressing it during the import. Instead, the option to Decompress the file when it is already in the GeoDict memory is available.
|
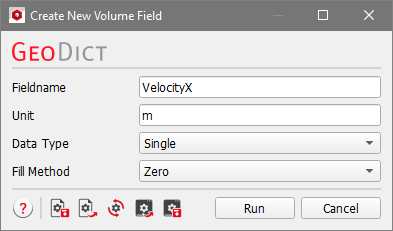
New Field
You can also create and add a New Field to a volume image.
In the opening dialog, enter a Fieldname and the desired Unit of the volume field.
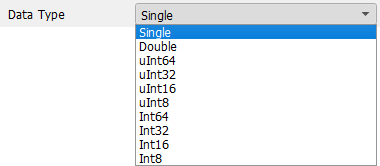
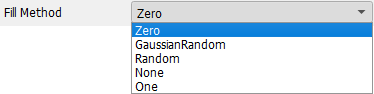
Select the Data Type from the corresponding drop-down menu.
The Fill Method determines if the values in the new field are all Zeros, Gaussian randomly distributed around Zero, randomly distributed between 0 and 1, None (which is the same as Zero ) or all Ones.
|
Copy / Move
With Copy or Move the entire volume image including all fields and values is copied or moved to another loaded volume file.
The modified file is only stored in GeoDict. To save it to the hard disk, click on Save Volume File.

|
Important! Volume images can only be copied or moved to another volume file if both files have the same dimension in number of voxels.
|
|
Remove
With Remove a volume image can be deleted from the GeoDict memory. It is not deleted from the volume file saved in the project folder.
|
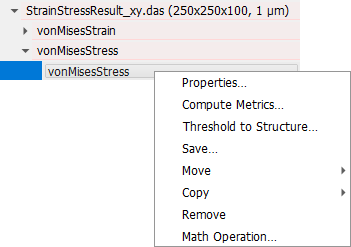
Volume Field right-click menu
Finally, a right click on a volume field provides other possibilities.
The commands Compute Metrics, Threshold to Structure, and Math Operations are explained in the corresponding sub-sections.
Properties
Under Properties you can change the Name and Unit of a volume field.
|
Save
The selected volume field can be Saved as *.guf file or in another file format. This is the same as Save Volume File in the File menu in the menu bar.
|
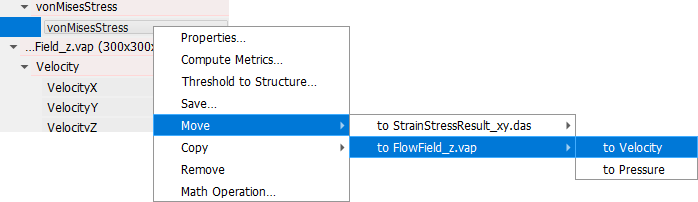
Copy / Move
With Copy or Move the volume field including all values is copied or moved to another loaded volume image.
It can be a volume image of the same volume file or another loaded volume file. The new volume image is only stored in GeoDict. To save it to the hard disk, click on Save Volume File.
|
Important! Volume fields can only be copied or moved to another volume image if both fields have the same dimension in number of voxels.
|
|
Remove
With Remove a volume field can be deleted from the GeoDict memory. It is not deleted from the volume file saved in the project folder.
|
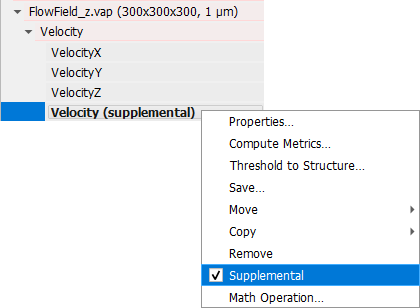
Supplemental
For some volume files, e.g. *.vap files, an additional supplemental field like the Velocity field is computed when loading the volume file. To save the supplemental field in the volume file, you can uncheck Supplemental and save the volume file afterwards.
|
Common erros
I cannot save a volume field as Integer Binary (*.raw) data!
The reason is that the data in the volume file has not the correct data type, e.g. it is a floating single precision value.
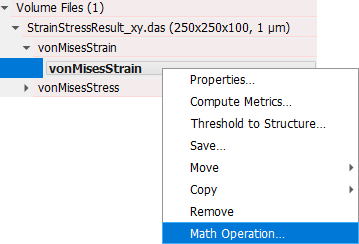
Use the math operation Convert to Data Type to save a volume field as RAW-file. For example, the field “vonMisesStrain” is saved in the following way:
- First, convert the data in the field to the correct data type (unsigned integer). Right-click on the vonMisesStrain field and choose Math Operation.
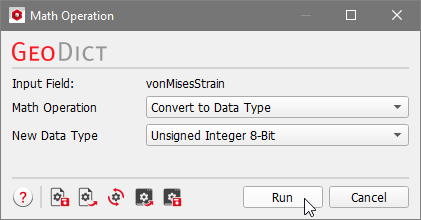
- In the dialog select Convert to Data Type from the first pull-down menu and Unsigned Integer 8-Bit from the second. Then click Run.
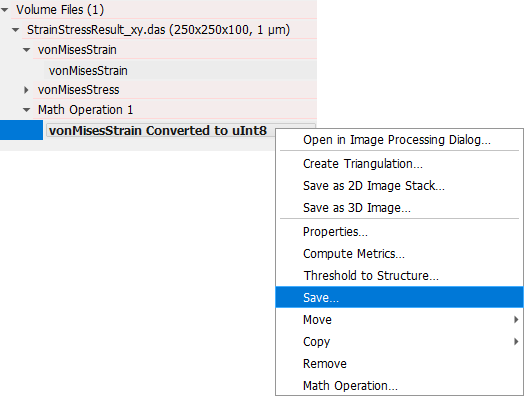
- A new Volume Image appears under the currently loaded Volume File: Math Operation 1. There, the new Volume Field vonMisesStrain Converted to uInt8 is shown. Right-click on it and choose Save.
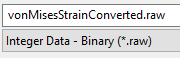
- Select a name and choose Integer Data - Binary (*.raw) as file type. Then, the volume field is saved in the chosen folder.
|