Video Editor
A large variety of possibilities to generate animations for videos is provided by the Video Editor.
The Video Editor uses keyframes to animate a structure or object in a user-defined manner. In the animation, the objects can be made to change position, orientation, size, etc. Most parameters of the visualization in GeoDict can be animated in the Video Editor, allowing to present structures as desired.
It can be opened in three different ways:
- Clicking Open Video Editor to edit any of the video presets (via the Video Editor)
- Clicking Open Current to open the animation last edited or used for video generation in the current GeoDict session.
- Clicking Open Empty to start with an empty dialog.
The 2D Video Editor opens from the 2D tab, and the 3D Video Editor from the 3D tab, but only the 3D Video Editor is described here, since the options are the same.
As seen below, the 3D Video Editor dialog contains the Properties field, Graph field, Value field, and the Output options. The 3D Video Editor dialog opens as a graph-editor that in the middle displays the flow and changes of the video on a 2D-graph (Graph field). The X-axis shows the time in frames and seconds and the Y-axis shows the values of the chosen parameters.
- On the left, in the Properties field, find the names of the properties corresponding to the plots in the Graph field.
- In the middle of the Video Editor, the Graph field contains a plot of the properties chosen in the Properties field. The curves are described by keyframes and data points, and display the changes of the properties over time.
- The options to be modified for a selected data point in the graph area are in the Value field in the upper right side of the Video Editor.
- Right below, find the Output Options. These are the same options shown when clicking Generate Video in the Create Video dialog, which opens the usual Export Video dialog.
The Video Editor fields can be collapsed and expanded by pulling the dotted lines in the left or the right, respectively.
Clicking Run starts the video generation. The video, result file, and result folder or Python macros, as defined in the Output Options, are placed in the current project folder.
Close the Video Editor by clicking Close.
|
Note! Keyframe is a frame in time used to indicate the beginning or end of a change made to a property. Data Point is a representation of a property on a keyframe which holds the current state of the property on the keyframe. Any video consists of frames and the frames represent specific time values. A keyframe stores all visualization values at a specific time. For example, if a structure should be clipped in X-direction, it requires a start keyframe for the beginning of the clipping property and an end keyframe for the finish of the clipping property. The clipping property is then interpolated in the interval between those keyframes. |

Save Settings
Check Auto-Save to save the current settings as start-up settings with each change. Thus, the video settings are not lost after closing GeoDict and can be loaded again by opening the Video Editor with the option Open Current in the next GeoDict session or by clicking the Load Start-up Settings icon in the bottom left of the Video Editor.
In the following the functionality of the icons to be found on the bottom left of the Video Editor dialog are explained:
|
Load the User Guide at this topic page. |
|
Save the current animation settings into a GeoDict Project Settings file (*.gps). |
|
Load animation settings from a previously saved *.gps file. |
|
Load the built-in default settings. |
|
Load previously saved start-up settings. |
|
Save the current animation settings as start-up settings. |
|
Raise the GeoDict main window (GUI). |


|
Note! Here, as an example, we modify the video preset Clipping X to describe the Video Editor’s options. Click Open Video Editor in the Clipping X video preset. 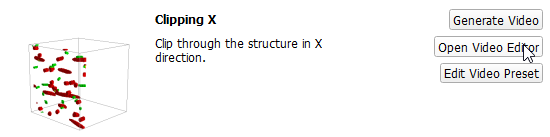 |