Contact Detachment
The Contact Detachment GeoApp allows using the work in progress version of the contact detachment feature. With this feature, it is possible to simulate detaching of contacts between objects in ElastoDict - Deformations simulations.

|
Modules needed to run this GeoApp:
ElastoDict-FeelMath
|
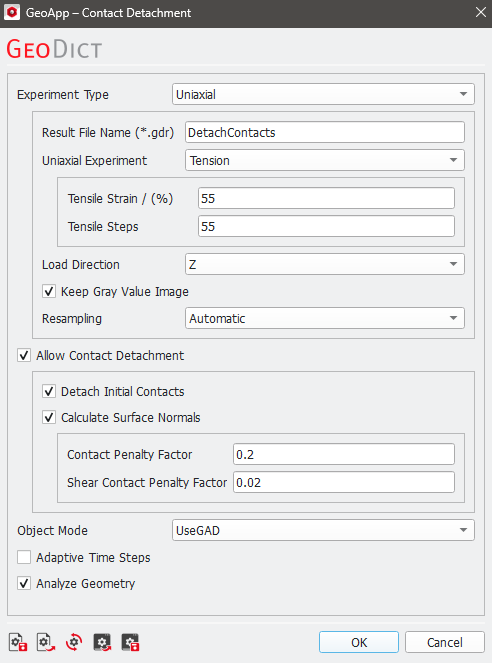
Click Edit… to open the Contact Detachment parameters dialog.
 Experiment Type
In the GeoApp it is either possible to directly set a uniaxial tensile experiment, a combined compressive/tensile experiment, or to use the current settings of ElastoDict Deformations.
The tensile experiment is chosen by selecting Tension in the dropdown menu. The experiment is defined by the maximal tensile strain (in percentage with respect to the original geometry) and the number of steps to apply this strain.
For the Compression and Tension experiment, a compression is applied to the geometry, followed by a tension. Again, both deformations are defined by the maximal strain (in percentage with respect to the original geometry) and the number of steps for each deformation.
For both experiments the Load Direction can be chosen (X, Y, or Z).
To keep the accurate volume fraction information for each material ID and update these in the memory, the Keep gray value image box can be checked. Although this option requires more memory, it results in more accurate deformation of the geometry if many small steps are computed. If this option is not chosen the volume fractions are segmented into a structure in each deformation step and the volume fraction information is lost.
The Resampling options are explained under ElastoDict Deformation - Geometry Handling in more detail.
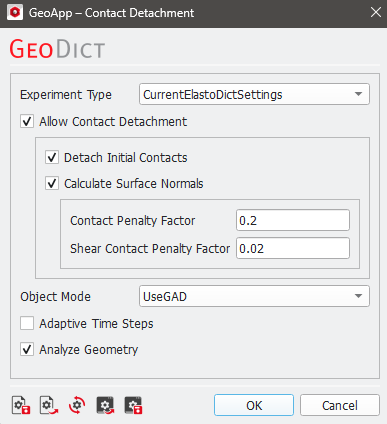
If you choose CurrentElastoDictSettings, the settings defined in the ElastoDict Deformations dialog will be used within the GeoApp. No additional adjustments can be made in this GeoApp dialog.
|
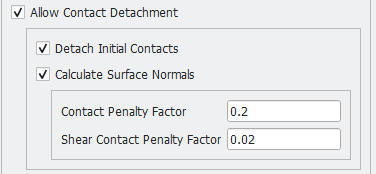
Allow Contact Detachment
If the option Allow Contact Detachment is checked, a detachment between different objects during the simulation run is possible.
Detachment is detected as soon as the stress changes from compression to tension in the contact area.
By choosing Detach Initial Contacts, a detachment is allowed for all objects, especially also for those, which are attached to each other initially. Otherwise, only objects can be detached, which were detached initially but get attached to each other during the simulation.
To Calculate Surface Normals between objects check the corresponding option. Only the tensile part of the surface normal is used for the detachment algorithm.
With the Contact Penalty Factor the detachment for contacts under normal load can be controlled. Choose a value between 0.0 (no resistance against detaching) and 1.0 (perfect contact). The higher the penalty factor, the later the detachment. Very small values can lead to convergence problems. For most cases the default value of 0.2 works well.
When Calculate Surface Normals is checked you can also define the Shear Contact Penalty Factor. With this parameter the detachment under shear load can be controlled. Choose a value between 0.0 (no resistance against detaching) and 1.0 (perfect contact). The higher the penalty factor, the later the detachment. Very small values can lead to convergence problems. For most cases the default value of 0.2 works well.
|
Object Mode
This simulation requires information about the objects in the structure. This information can be provided in two ways:
- As GAD objects (select Object Mode - UseGAD)
- Via a G32 file (select Object Mode - LoadFile)
|
Adaptive Time Steps
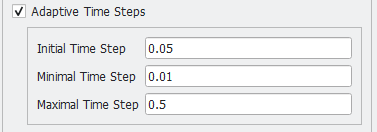
Since GeoDict 2026 it is possible to run the simulation with Adaptive Time Steps.
Define the Initial Time Step, with which the solver starts the simulation. The number of iterations from the first step is kept as reference value. For all subsequent simulation steps the number of iterations is compared to this reference number of iterations: if it is much smaller, the time step size is increased. Is it much larger, the time step is discarded and restarted with a smaller time step size. As soon as the minimal time step size is reached, the solver finishes the step and proceeds with the next step.
The time step size is always kept within the predefined bounds: it will never exceed the predefined Maximal Time Step and never fall below the Minimal Time Step.
|
Analyze Geometry
When the Analyze Geometry box is checked, GeoDict verifies the existence of a solid load path before beginning the simulation. This ensures that the geometry is properly connected as is typically intended.
In special cases, you can disable this check by unchecking Analyze Geometry. You may want to do this if you are using the same structure again or if you have already performed this check and know that a path exists.
|
Results
Click OK to close the Contact Detachment Parameters dialog. Then click Run to start the Contact Detachment simulation. The results are stored in the result file previously entered under the Result File Name (*.gdr) field of the Contact Detachment Parameters dialog.
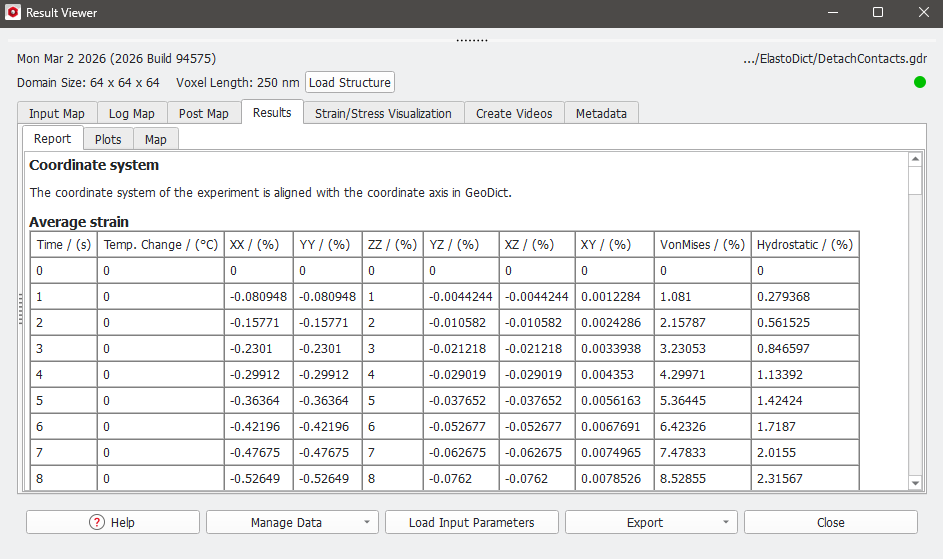
After a successful run, the Result Viewer opens automatically showing the Results - Report subtab.
In this example, a Tension experiment is simulated in which two objects are pulled in the Z-direction, resulting in object detachment.
Report
The strain that the objects undergo is documented in the first table of the Report tab in the Result Viewer. Since the Uniaxial Experiment - Tensile with a maximum strain of 55% was defined in the Macroscopic Load tab, the average strain values for the ZZ column start at 0% and end at 55% after 55 steps.
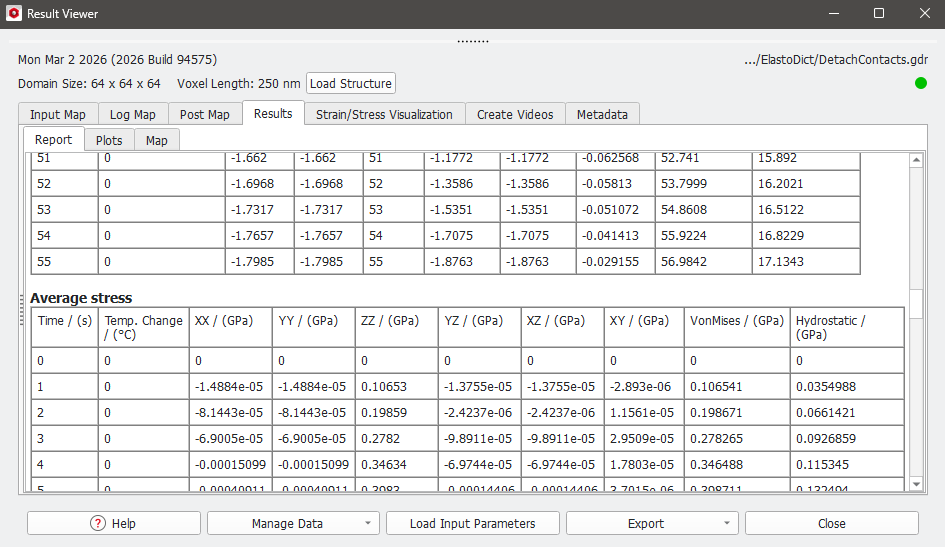
In the table below, the Average stress is displayed.
|
Plots
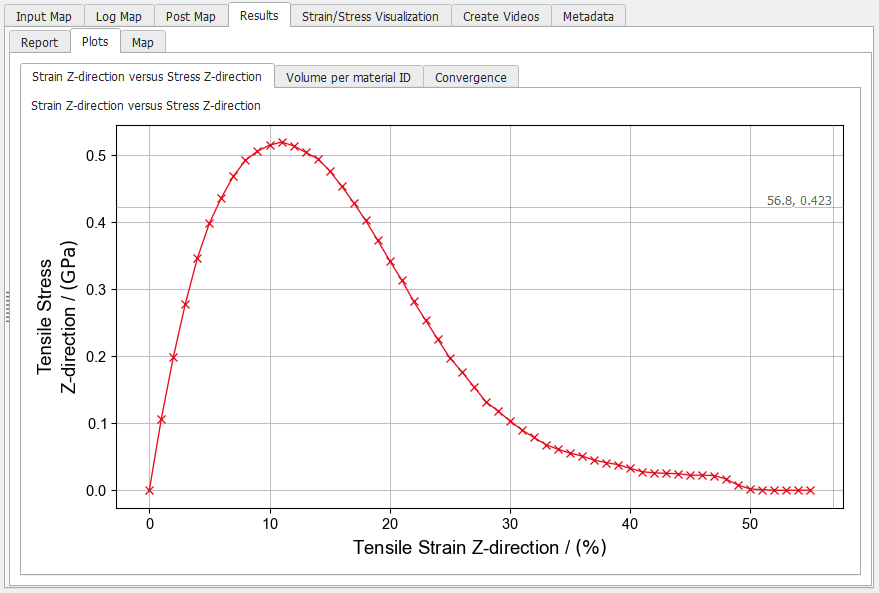
The figure in the Plots subtab of the Results tab plots the tensile stress over tensile strain, which is a graphical representation of the table content in the Report tab. Tensile stress reaches its maximum at 11% strain and becomes zero at approximately 51% strain. At this point, the two objects begin to separate.
|
Strain / Stress Visualization
In the Strain/Stress Visualization tab, the different result files can be loaded according to the description for ElastoDict Deformations.

|
Know how! For this type of experiment, Box Structure Rendering might be a better choice since it allows for more precise observation of detachment, as seen in the pictures below.
|
|
Create Videos
The detachment process can be visualized using the options found under the Create Videos tab.
|